
Have you ever thought that one day you will no longer rely on the power grid and use your own electricity? All of this can be achieved by off-grid solar systems.
Many people think that building an off-grid solar system is a complicated matter, and only professionals can do it. In fact, it's not - as long as you have a little hands-on spirit and understand some basic principles, you can completely build a small solar power generation system by yourself step by step.
It can not only bring you considerable economic benefits, but also bring you a sense of security of "mastering the initiative of energy".
Don't you know the working principle of off-grid solar system?
Click to read our previous article, "What Is an Off Grid Solar System and How Does It Work?," to learn the basics before starting your DIY project.
Next, I will show you what equipment a DIY off-grid solar system needs, how to plan and install it, and how to make it run stably. Maybe after reading this article, you can build a "small independent power station" by yourself.
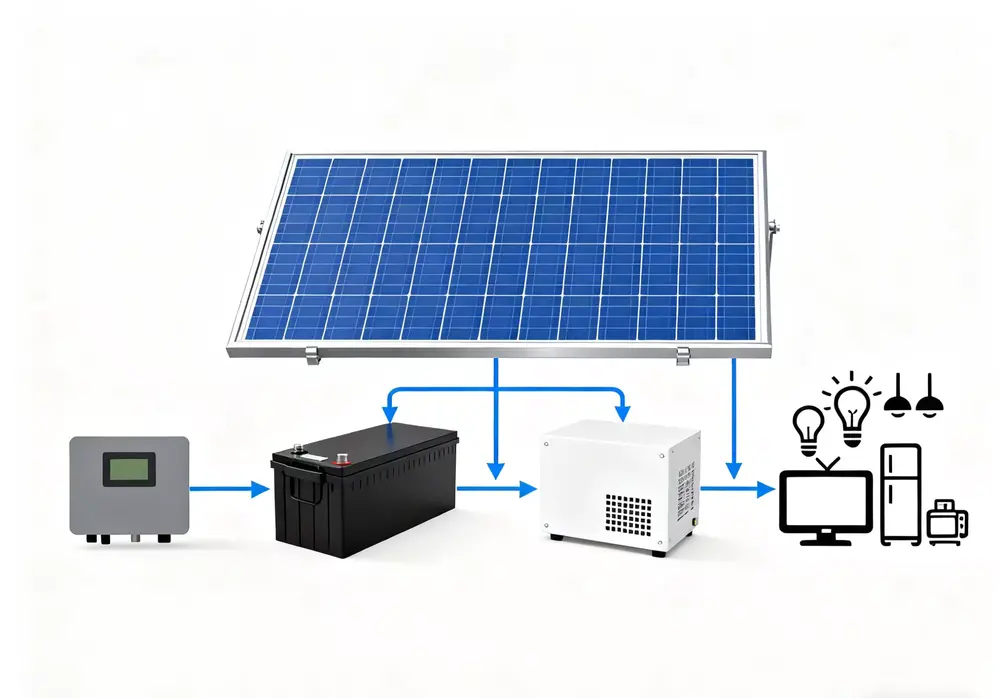
Main Components of an Off Grid Solar Panel System
A complete off grid solar power kit consists of several essential parts that work together to capture, convert, and store solar energy.
Solar Panels
Solar panels are the heart of the system, converting sunlight into direct current (DC) electricity.
LZY Energy solar panels are designed for high efficiency and long-term durability, making them ideal for solar panels for off-grid living in any environment.
Battery Storage System
The battery bank stores the excess energy produced during the day for use at night or on cloudy days.
This battery system has a capacity of 100-500kWh and can be customized according to the size of the household or the electricity demand, making it key to realizing an autonomous solar energy system.
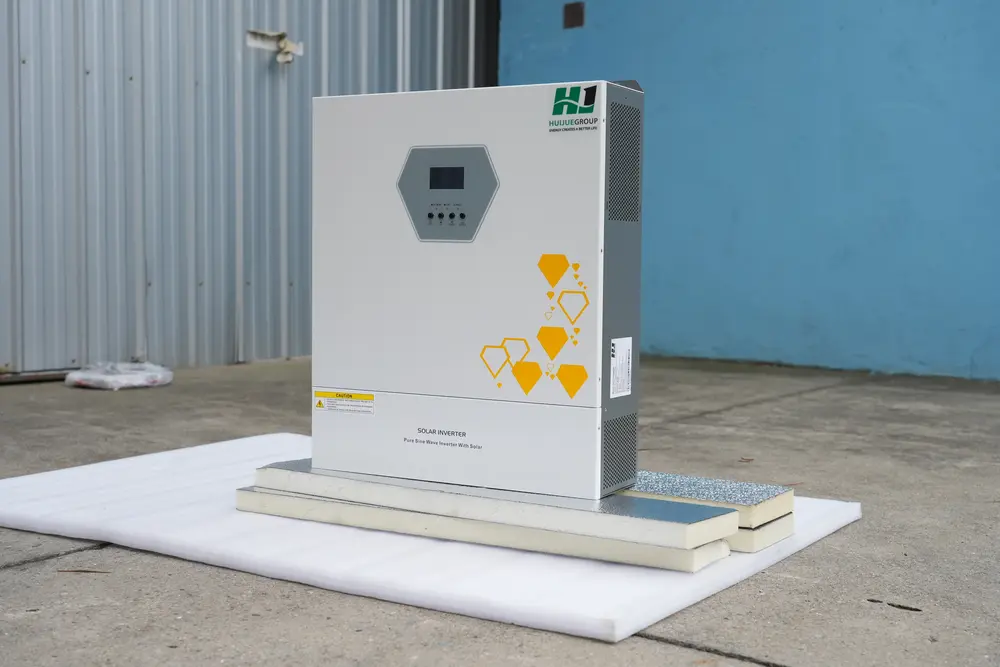
Inverter
An inverter converts DC electricity from the solar panels and batteries into alternating current (AC), which is compatible with most household appliances.
LZY Energy’s inverters feature intelligent management and high conversion efficiency, ensuring reliable power output.
Charge Controller
The charge controller protects the battery from overcharging and over-discharging, optimizing performance and extending its lifespan.
What You’ll Need for a DIY Off-Grid Solar Setup
Before doing it, the most important thing is not to buy equipment, but to plan your electricity consumption and installation environment. This step is like laying the foundation before building a house. The more solid it is, the more stable the system behind it will be.
You can first list all the devices to be powered - such as lamps, refrigerators, pumps, laptops, chargers, etc. - and record their power (W) and daily usage time (h). Add up these data to roughly estimate the power (Wh) you need every day. This will directly determine the size of the solar panel, the capacity of the battery, and the output power of the inverter you need.
Next, you need to prepare some basic tools and materials, including:
Muldmeter: used to detect whether the voltage, current and system connection are normal;
Wrench and screwdriver: install the bracket and tighten the wiring;
Insulating tape and cable crimping pliers: ensure that the connection is safe and reliable;
Safety gloves and goggles: protect yourself during installation;
Install brackets and cables: choose the appropriate length and specifications according to the roof or ground environment.
If it's your first time to try the DIY off-net system, don't worry - just follow the plan step by step, and you will find that it is actually much easier than you think. And when the system is successfully running and the lights are on, you will have a sense of accomplishment of "lighting energy independence with your own hands".
How to Calculate Your Power Needs and System Size
When you know the daily electricity consumption, the next thing you need to do is to calculate how much power generation and storage capacity your system needs. Don't worry, this part is not complicated. We can judge it with a simple idea.
Step 1. Determine the daily power consumption first.
Assuming that your device requires a total of 2,000Wh (i.e. 2kWh) of power per day, this is the energy that your system must be able to provide at least every day.
Step 2. Calculate the required solar panel power
The power generation of solar panels depends on daylight hours and system loss. Generally speaking, you can use this formula to estimate:
Solar panel power (W) × Daily effective sunshine hours (h) × 0.8 ≈ Daily power output (Wh)
Assuming that your area has an average of 5 hours of effective sunshine per day, it is calculated as follows to meet the demand of 2,000Wh:
Solar panel power = 2,000 ÷ (5 × 0.8) ≈ 500W
That is to say, a set of solar modules of about 500W (such as 2 250W panels) can meet this power consumption. If you want to leave a little more space to cope with rainy days, you can increase the configuration to 600W or 800W.
Step 3. Choose the appropriate battery capacity
The function of the battery is to store electricity to ensure that it can still be used at night or on cloudy days. It is usually recommended that the battery can store power for at least 1 to 2 days. Assuming that you consume 2kWh a day and use the 12V system:
Required battery capacity (Ah) = 2,000 ÷ 12 ≈ 167Ah
Considering the discharge depth (for example, lithium batteries are recommended to be discharged to 80%), you may need a set of 200Ah lithium batteries. If you want a longer battery life, such as two days on a rainy day, prepare an energy storage capacity of about 400Ah.
Tips:
If you plan to use high-power equipment such as refrigerators and microwave ovens, remember to pay attention to the power output of the inverter at the same time. It is recommended to choose a model with a rated power of not less than 1.2 to 1.5 times the total load.
For beginners, you can give priority to choosing a complete set of off-grid solar system, because it has helped you match the components and is more convenient to install.
Installation and Safety Tips
When the solar panels, batteries and inverters are ready, the next most critical link is the wiring and installation of the system. This step determines whether the whole off-grid system can operate safely and stably, so it must be patient and careful.
I. Prepare the necessary tools and wires
Before you do it, make sure you have the following tools at hand:
Wire stripping pliers and wire press pliers
Insulating tape, waterproof joint
Ommeter (used to detect voltage and polarity)
Thick enough solar wire (usually 10AWG or thicker)
Suggestion: The thicker the wire diameter, the smaller the loss when the current passes; if the distance is far (for example, the solar panel is more than 5 meters away from the battery), it is recommended to choose a thicker cable to reduce the pressure drop.
II. Standard connection order (very important)
The off-grid solar system is generally composed of solar panel → controller → battery → inverter → load equipment. The correct connection order can avoid the risk of current backfill or short circuit. It is recommended to follow the following steps:
Connect the controller and battery first.
Connect the "battery port" of the controller to the positive and negative poles of the battery. This step allows the controller to obtain a stable voltage first to avoid misjudgment of the system state.
Note: Be sure to connect the battery first, and then connect the solar panel!
Connect solar panels and controllers
Next, connect the positive and negative lines of the solar panel to the corresponding interface of the controller.
At this time, the controller should automatically detect the photovoltaic input and display the working status (such as power generation voltage, charging current, etc.).
Connect the inverter
Connect the inverter to both ends of the battery to convert direct current (DC) into household alternating current (AC).
If the inverter has a switch, please make sure that all the lines are connected before turning it on.
If the load power is large, please use the fuse or circuit breaker separately to prevent overload.
Connect the load equipment (home appliances)
Finally, insert your lamps, small refrigerators, fans or other devices into the output of the inverter.
Turn on the system and check whether the voltage is normal and whether the inverter indicator light is on steadily.
III. Safety and protection suggestions
Make sure that all wiring is firm and not loose, and the interface can be protected with insulating glue or waterproof joints.
The installation angle of solar panels is based on the principle of maximizing sunshine, and the inclination angle is usually equal to the local latitude of ±10°.
The battery should be placed in a cool and ventilated place, avoiding direct sunlight and humid environment.
If conditions permit, open-circuit switches and fuses can be installed to ensure that the power protection system can be cut off in time when a failure is encountered.
After this step, your DIY off-grid solar system can basically be put into use. Next, you only need to test the operation of each link, and you can enjoy the independent clean power system created by yourself.
System Testing and Troubleshooting
Congratulations! Your off-grid solar system is now complete. However, testing and debugging are essential before official use. This not only ensures stable power generation but also helps you identify and resolve potential problems promptly.
I. Initial Power-On Test
Check Wiring Sequence and Polarity
Reconfirm all positive and negative connections are correct, especially between the battery and controller, and between the controller and solar panels. Reversing polarity is one of the most common and damaging errors.
Test Solar Input
When the sun is sufficient during the day, use a muldmeter to measure the output voltage of the solar panel (usually slightly higher than the nominal voltage of the 12V system, such as 17V~18V).
Then check the controller display or indicator light to confirm whether it is charging.
Observe the change of battery voltage
When the system starts to run, the battery voltage should gradually rise; if the voltage remains unchanged, the wiring may be loose or the controller setting is wrong.
Turn on the inverter test output
Turn on the inverter and connect a small-power device such as a lamp or fan. If it runs normally, it means that the inverter output is stable; if there is an alarm or no power output, it is necessary to check whether the wiring, voltage or load power match.
II. Common Problems and Solutions
| Problem | Possible Cause | Solution |
| Controller has no response | Incorrect wiring or battery not connected | Ensure battery is connected first, then connect the solar panel |
| Solar panel not charging | Cloudy weather, dust coverage, or loose wiring | Clean the panel, check wiring, ensure direct sunlight exposure |
| Battery not fully charged | Improper settings or insufficient battery capacity | Check controller parameters, confirm compatibility with battery specifications |
| Inverter alarm or auto shutdown | Low voltage or overload | Check battery level, reduce load power |
| System shuts down at night | Insufficient battery storage | Increase battery capacity or reduce nighttime power usage |
III. Maintenance and Optimization Recommendations
Clean up solar panels regularly: dust, leaves or bird droppings will affect power generation efficiency. It is recommended to clean them up once a month.
Check the battery voltage and capacity every three months: If it is found that the discharge is too fast, it may be due to the battery aging or loose connection.
Optimize the angle and position: As the season changes, the inclination of the solar panel can be fine-tuned to obtain higher power generation.
Record running data: If possible, you can install a controller with Bluetooth or WiFi function to view the charging and discharging status and power generation curve in real time.
After testing and optimization, your DIY off-grid solar system can run stably!
Next, whether you are camping outdoors, living on a farm, or wanting to provide backup electricity for your home, you can truly experience a self-sufficient green energy life.
Off-Grid Solar System Cost Breakdown
The total cost of a complete off-grid solar solution varies depending on capacity, location, and equipment quality. Below is a general breakdown:
| Component | Price Range (USD) | Approx. Share |
| Solar Panels | $0.2–0.4 / W | 30% |
| Battery System | $200–400 / kWh | 40% |
| Inverter & Controller | $0.1–0.2 / W | 20% |
| Installation & Accessories | ~10% | — |
A 5kW off-grid system typically costs between $6,000 and $10,000, but offers a return on investment within 5–7 years — with almost zero ongoing maintenance.
Real-World Example: From a Remote Farm to Energy Independence
A customer in Southeast Asia installed a complete off-grid photovoltaic system to power their remote farm.
Their setup included:
15 high-efficiency solar panels (6kW total)
20kWh battery system
5kW inverter with smart EMS control
The system was fully installed in just two days and now provides consistent power for irrigation, lighting, and daily operations — completely independent from the grid.
Where to Buy and Get Technical Support
LZY Energy offers complete, modular off grid solar power kits that make setup easier and more reliable.
You can explore our full range of products here:
Solar Panel System
Battery Storage System
Inverter System
We provide customized configurations, technical guidance, and professional after-sales support — helping you achieve true energy independence wherever you are.
Conclusion: Start Your Journey Toward Energy Freedom
Whether you live off the grid, run a remote cabin, or simply want to reduce dependence on utility companies, an off grid solar panel system is the cornerstone of a sustainable future.
With LZY Energy’s smart solar solutions, you can power your world — cleanly, efficiently, and independently.